
How to Set Up TaxJar in Connected Business
This guide walks you through the step-by-step process of integrating TaxJar with Connected Business (CB) to automatically calculate and manage sales tax.
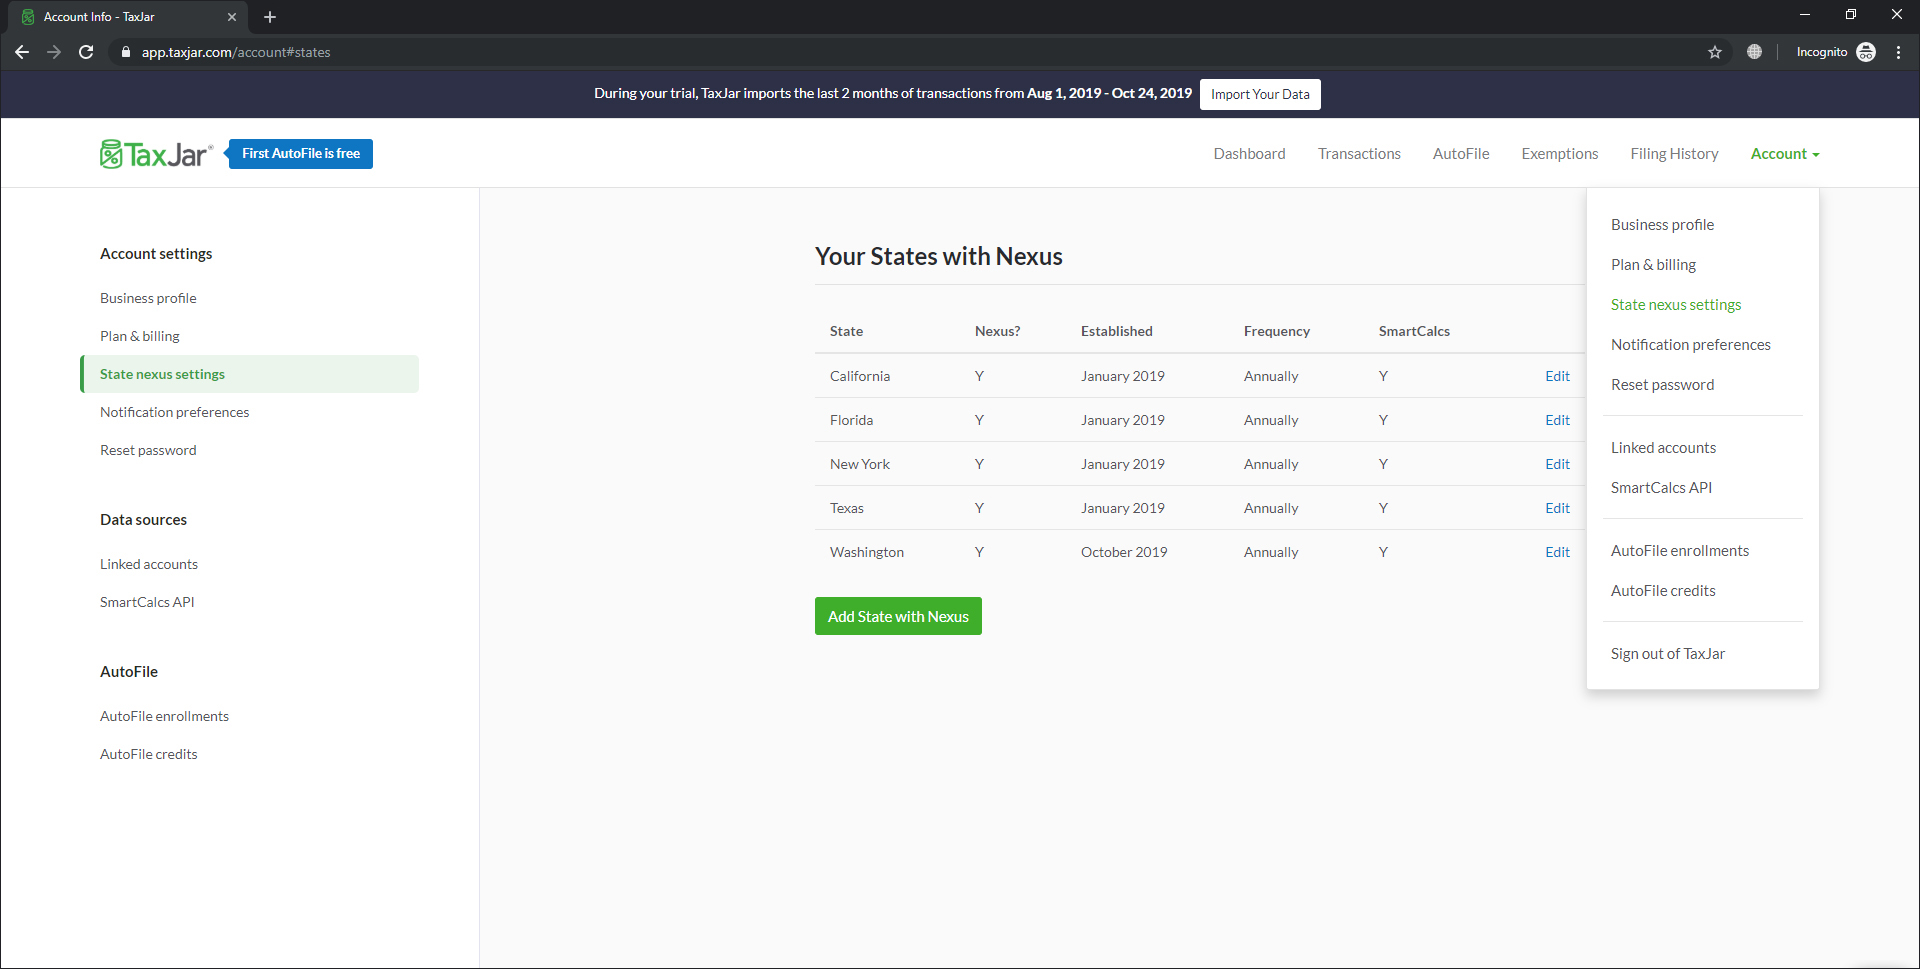
1. Configure Taxable States in TaxJar
- Log in to your TaxJar account.
- Navigate to State Nexus Settings.
- Add all states where your business has tax obligations (taxable states).
You can access it here:
https://app.taxjar.com/account#states
Note:
- The list of taxable states used in Connected Business is directly pulled from your TaxJar account.
- Any state added in TaxJar will automatically be reflected in CB.
2. Enable TaxJar in Connected Business
- Log in to Connected Business.
- Go to:
System → Setup → Country - Open USA.
- Assign TaxJar as the tax provider.
This step enables TaxJar integration for all U.S. transactions.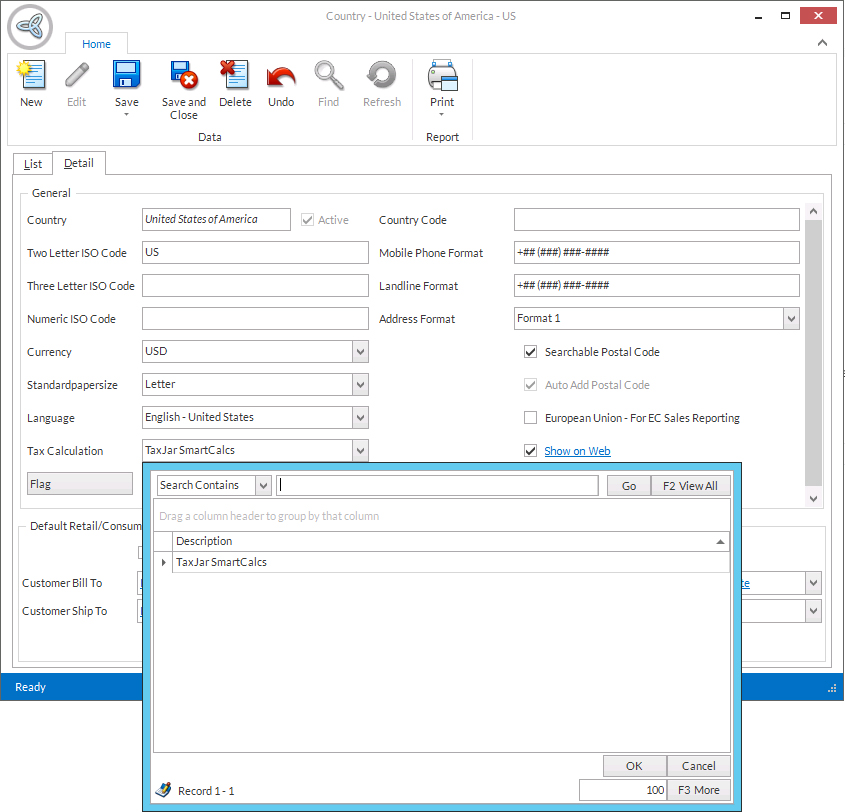
3. Get TaxJar API Token
- Go back to your TaxJar account.
- Navigate to SmartCalcs API Token.
- Copy the Live Token.

4. Configure TaxJar in CB Tax Settings
- In Connected Business, go to:
Accounting → Setup → Tax - Open the Tax Service Form.
- Paste the Live Token from TaxJar.
- Save your changes.

5. Set Up Tax Categories (Optional but Recommended)
Connected Business allows you to define tax rules based on customer type.
Option A: Automated Criteria
- Go to the Customers tab in the Tax setup.
- Add criteria (example):
DefaultPrice = "Retail"
- Click OK and then Save.
This automatically marks all retail customers as taxable. 
Option B: Manual Assignment
- Open a Customer Ship-To record.
- Assign the appropriate Sales Tax Type (taxable or tax-exempt).
Note:
Make sure Step #2 (enabling TaxJar in Country setup) is completed to activate this dropdown.

6. Special Tax Categories
- You can configure special tax categories (e.g., clothing, food, digital goods).
- These categories are based on TaxJar’s predefined list.
- Any updates in TaxJar will reflect in Connected Business.
7. Test Tax Calculation
- Create a new Sales Order or Invoice.
- Ensure the customer and ship-to address are set correctly.
- The system will automatically retrieve the tax rate from TaxJar.
8. Sending Transactions to TaxJar (Optional)
If you want to sync transactions (Invoices / RMA or Credit Memo) to TaxJar:
- Set up a Job Service.
- Create a corresponding Job Plan for TaxJar integration.
- Schedule or run the job as needed.
How to Set Up and Run the Connected Business Job Service
The Connected Business Job Service Manager allows you to execute job plans created in Connected Business. This is commonly used for automation tasks such as syncing transactions (e.g., sending invoices to TaxJar), scheduled processes, and background operations.
1. Launch the Job Service Manager
Option A: Start Menu
- Go to:
Start Menu → Connected Business 13.2 → Tools → Connected Job Manager 13.2 - The Connected Business Job Service Wizard will open.
- Click Next to proceed.
Option B: Installation Folder
- Navigate to your Connected Business installation directory.
- Locate and run:
Interprise.Presentation.JobManager.exe - This will launch the Job Service Wizard.
2. Configure Database Connection
- Press F2 to open the Database Connection Configuration window.
- Enter the required database details:
- Server name
- Database name
- Username and password
- Click Verify Credentials to ensure the connection is valid.
- Click Next to continue.
Note:
If your company configuration is not yet set up, refer to your system’s Configuration / Signing-In guide.
3. Configure General Settings
On the General page, define the Job Service settings:
| Field | Description |
|---|---|
| Service Name | Default is ConnectedBusinessJobServiceManager_13_2. You may change this if needed. |
| Display Name | The name shown in Windows Services. |
| Description | Brief explanation of the service purpose. |
| Start Type | Determines how the service starts: • Automatic – Starts when the computer boots • Manual – Start manually when needed • Disabled – Service is turned off |
| Idle Time | Time before the service processes queued jobs. |
| Max Thread | Number of concurrent job processes allowed. |
4. Install the Job Service
- Click Install to begin installation.
- Once installed successfully:
- The service will automatically start (if set to Automatic).
- Click Next, then Finish to complete setup.
5. Modify or Reinstall the Service (If Needed)
- To update settings:
- Click Uninstall
- Adjust configurations
- Click Install again
6. Verify the Job Service Status
To confirm the service is running:
- Go to:
Start → Settings → Control Panel → Administrative Tools → Services - Look for:
ConnectedBusinessJobServiceManager_13_2 - Check the Status:
- Running → Service is active
- Stopped → You may manually start it
- In the Action page, select the available job items to process. You can also right-click on the Job Item to manually run the Job Items "TaxJar Transaction Manager" to send the transactions to Taxjar portal.
How to Set Up a Job Plan for TaxJar in Connected Business
To improve efficiency and automate processes such as sending invoices and credit memos to TaxJar, you can configure a Job Plan in Connected Business.
A Job Plan allows you to schedule and execute one or multiple job items (plugins) automatically based on defined triggers. It can also be linked to other job plans as dependencies.
1. Create a New Job Plan
You can create a job plan using either of the following:
Option A: Manage Job Plan
- Go to:
System Manager → Job Manager → Manage Job Plan - Click New
Option B: Job Calendar
- Go to:
System Manager → Job Manager → View Calendar → Job Calendar - Click New Job Plan
This will open the New Job Plan Wizard.
2. Configure General Information
Fill out the required fields:
| Field | Description |
|---|---|
| Description | Enter a brief description (e.g., TaxJar Transaction Sync). |
| Operator | Select the user responsible for executing the job. |
| Email address for notifications. | |
| Notify when Elapsed Time is Needed | Enable to receive alerts when execution time exceeds expected duration. |
| Notify on Started | Sends notification when the job starts. |
| Notify on Error | Sends notification if an error occurs. |
| Notify on Completion | Sends notification after successful execution. |
Click Next to proceed.
3. Set Job Trigger (Schedule)
Define how often the job will run.
Available Options
One-Time Execution
- Use for a single run.
- Set:
- Start Date
- End Date
- Execution Time
Daily Execution
- Use for recurring automation.
- Set:
- Start Date
- End Date
- Execution Time
- Select Run Days (e.g., Monday–Friday).
Repeat Interval (Optional)
- Enable Repeat Task Every
- Set interval in:
- Minutes or hours
This is useful for near real-time syncing with TaxJar.
Click Next after configuring.
4. Configure Job Actions (TaxJar Integration)
- In the Action page, select job items from the Available Job Items panel.
- Look for and select:
TaxJar Transaction Manager - Click ( > ) to move it to the Selected Job Items panel.
Manual Execution Option
- You can also right-click the job item:
- Select Run to manually trigger sending transactions to TaxJar.
Note:
If the TaxJar job item is not available, ensure the required plugin is installed. Refer to Register Plug-ins for setup.

5. Set Job Dependencies (Optional)
- In the Dependent On page, select an existing job plan if this job should run after another process.
- Leave blank if no dependency is required.
Click Next.
6. Complete the Job Plan
- Review your setup.
- Click Finish to create the job plan.
7. Important Notes
- Ensure the Job Service is installed and running; otherwise, scheduled jobs will not execute.
- The TaxJar Transaction Manager job is responsible for sending:
- Invoices
- RMAs (Credit Memos)
to the TaxJar portal.
- For best results:
- Use Daily + Repeat Interval (e.g., every 30 minutes) for near real-time syncing.
- Always monitor notifications for errors or failed executions.
